Quick start guide for creating and pasting a stamp to a Microsoft Word
To create a layout, follow the link to the online stamp image maker, MyStampReady. On this site, we can download the print online.
To create a print, click the New print+ button in the upper right corner of the editor.
Before us, there is a menu where we choose the type of printing and set its size.
After that, the interface with the tools opens. At the top, we see 4 buttons: Text in a circle, Text, Circle, and Pictures.
Text in a circle - by clicking this button to the left of the preset, a text box appears, which will be rounded in the circle of your print. To the right of the preset, text editing tools appear. Where you can change its size, font, radius, arc length, and starting point.
Text - clicking this button to the left of the preset will also display a text box in the print center. To the right of the workpiece, there is already a familiar text editor. Where you can choose the size, font, text position by x, text position by y.
Circle - this button adds new circles to your print. If you click this button to the right of the preset, the new circle editor will appear. Where you can specify the radius and thickness.
Pictures - clicking on this button, to the right of the blank, you will see a field for selecting a logo for your print. But in addition to choosing from ready-made images, you can upload your image.
- the print Type, I chose a circle with a radius of 38 mm.
- I want to add the name of my organization, PSRN, and TIN. To do this, I click on the Text button in a circle. In the appeared field I write the name of the organization "LLC Firm". Note that the number of times you write text in this field, the number of times it will repeat in the circle of your printing. TIN and PSRN add in the new field, again by clicking the button, the text around the circle. After that, edit the text as we need to use the interface on the right side.
- Then I go back to the shape settings and edit its radius and thickness.
- To separate the organization name, TIN, and PSRN from the print logo, I press the Circle button. On the seal, there is a new circle, which I edit our usual interface to the right of the workpiece.
- Now add text to the print center. To do this, click the Text button and in the field that appears, write the information we need. Then also edit the label interface on the right.
- Go to the final stage of creating the print. Press the picture button and select the logo for your print. I choose scales. You can choose something else or even fill in your image.
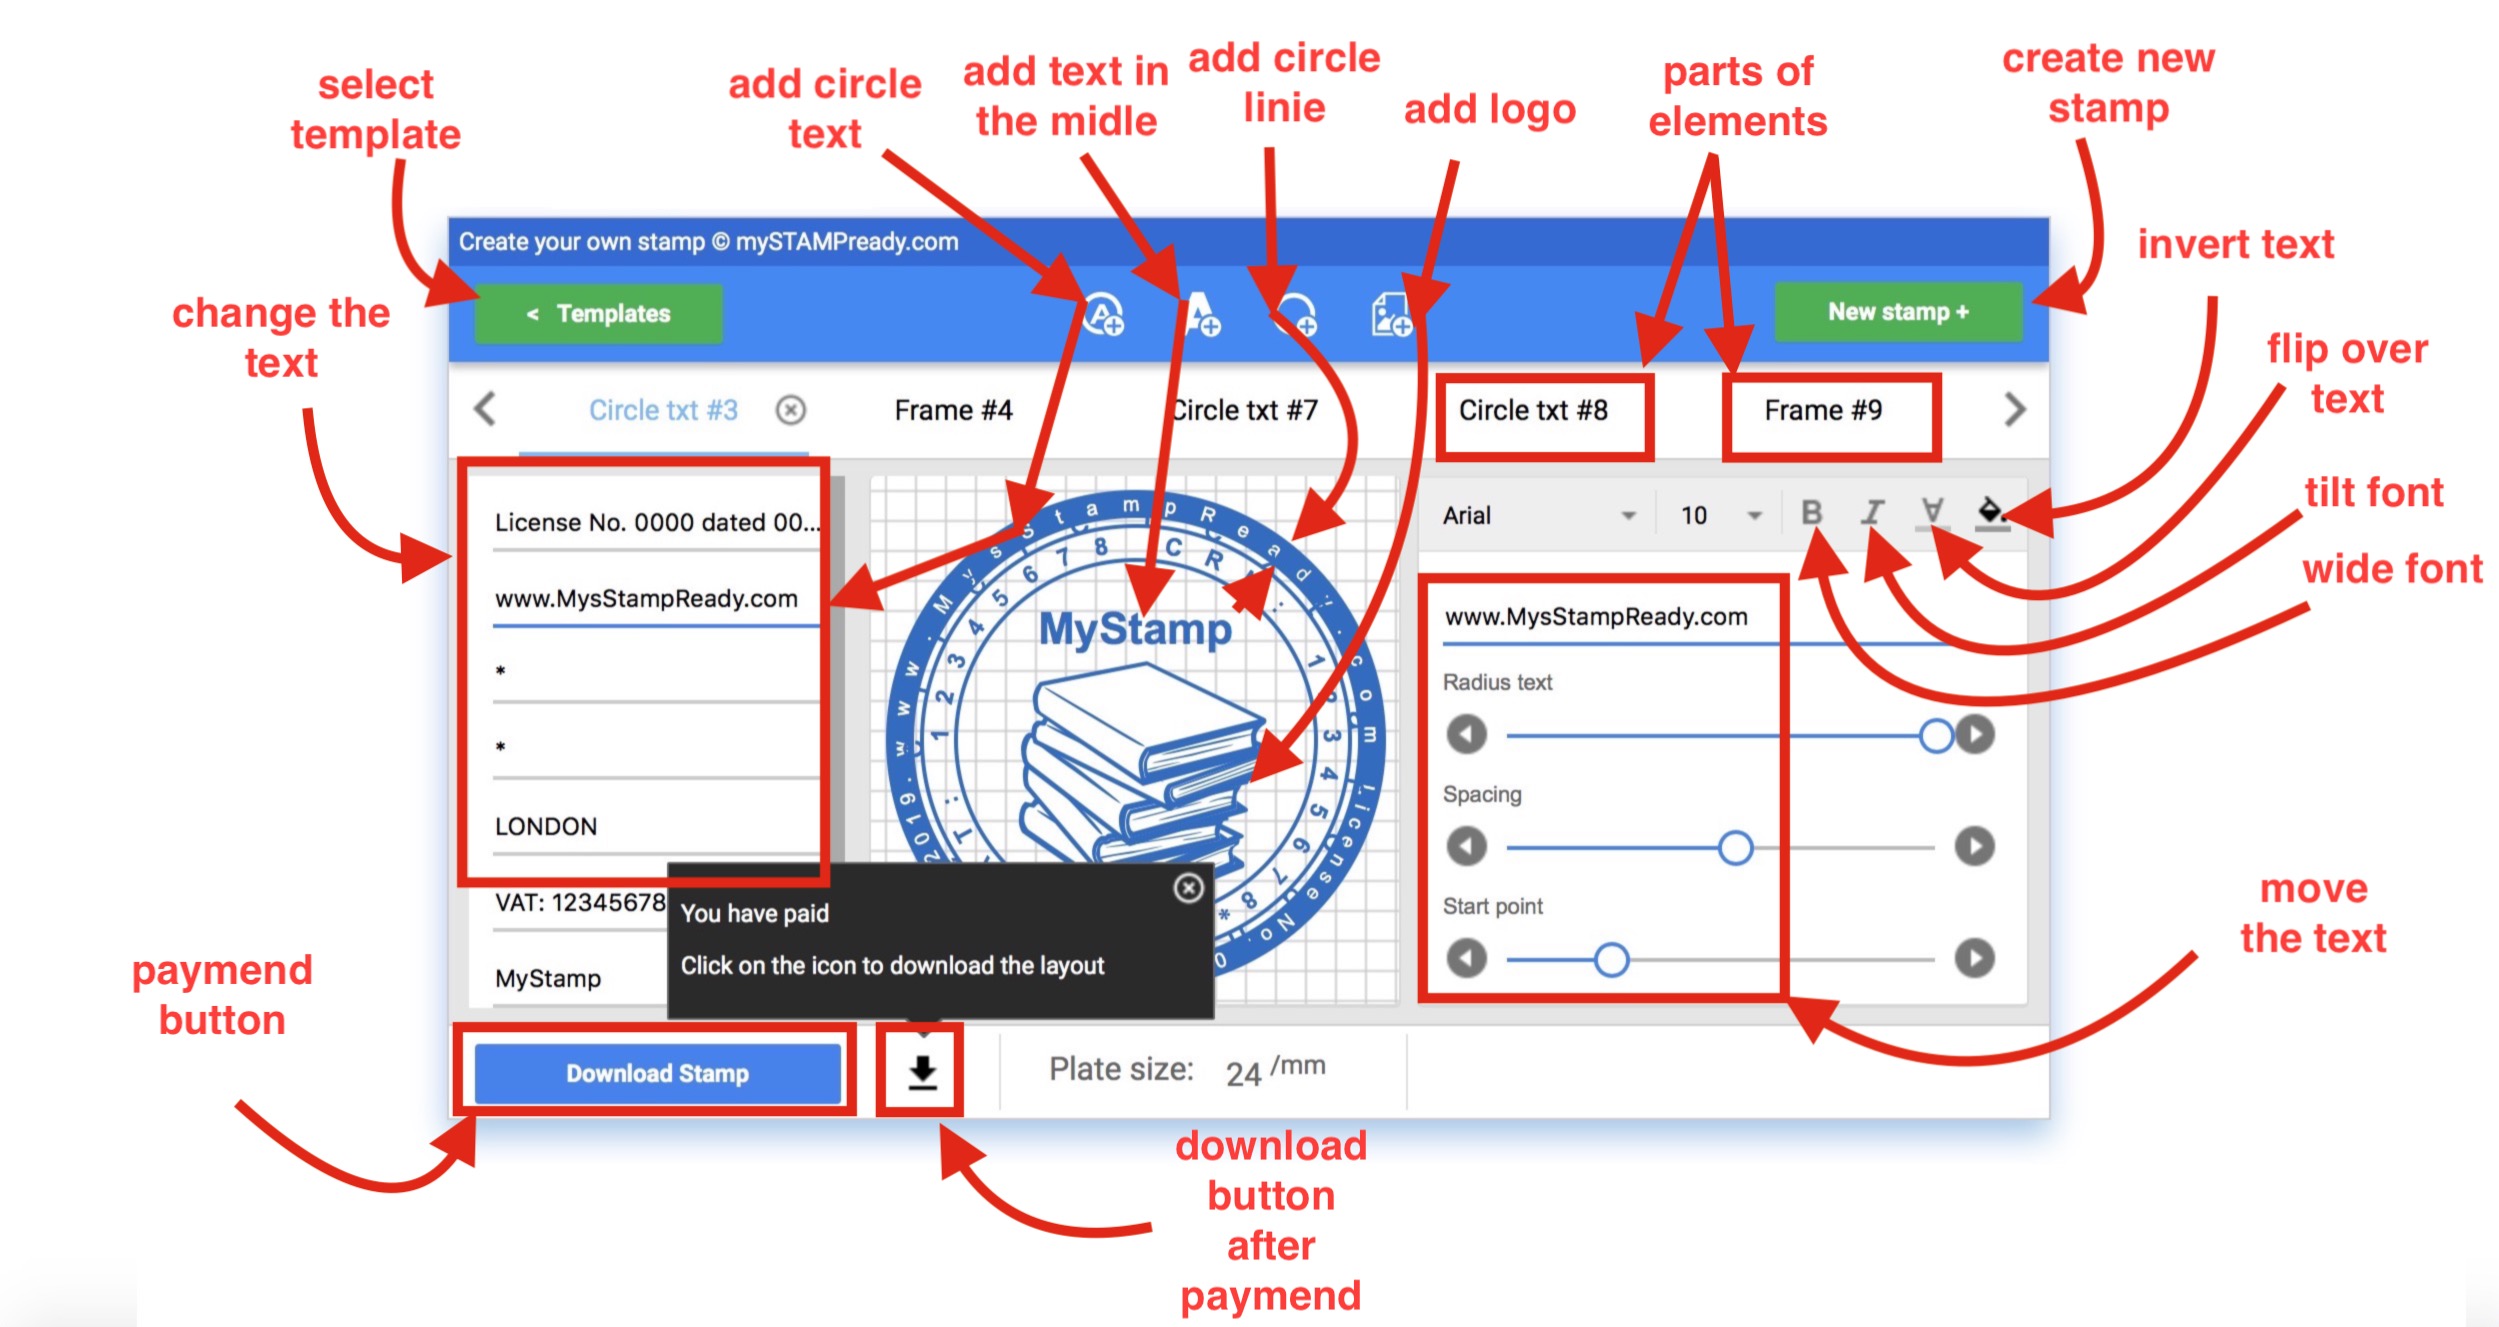
To download the print to your computer, you need to click the Download stamp button in the lower-left corner of the stamp designer. After that, a dialog box appears where we can download the print for free in low quality, with an opaque background and a small size. Or buy a print for a small amount, but get a quality layout, with a transparent background and large size. I'll choose to download for some dollars After that, a window appears in which we enter the e-mail address to which we will receive a print after payment. Agree to the user agreement and click pay. You can pay by Bank transfer through a Bank card or e-wallets.
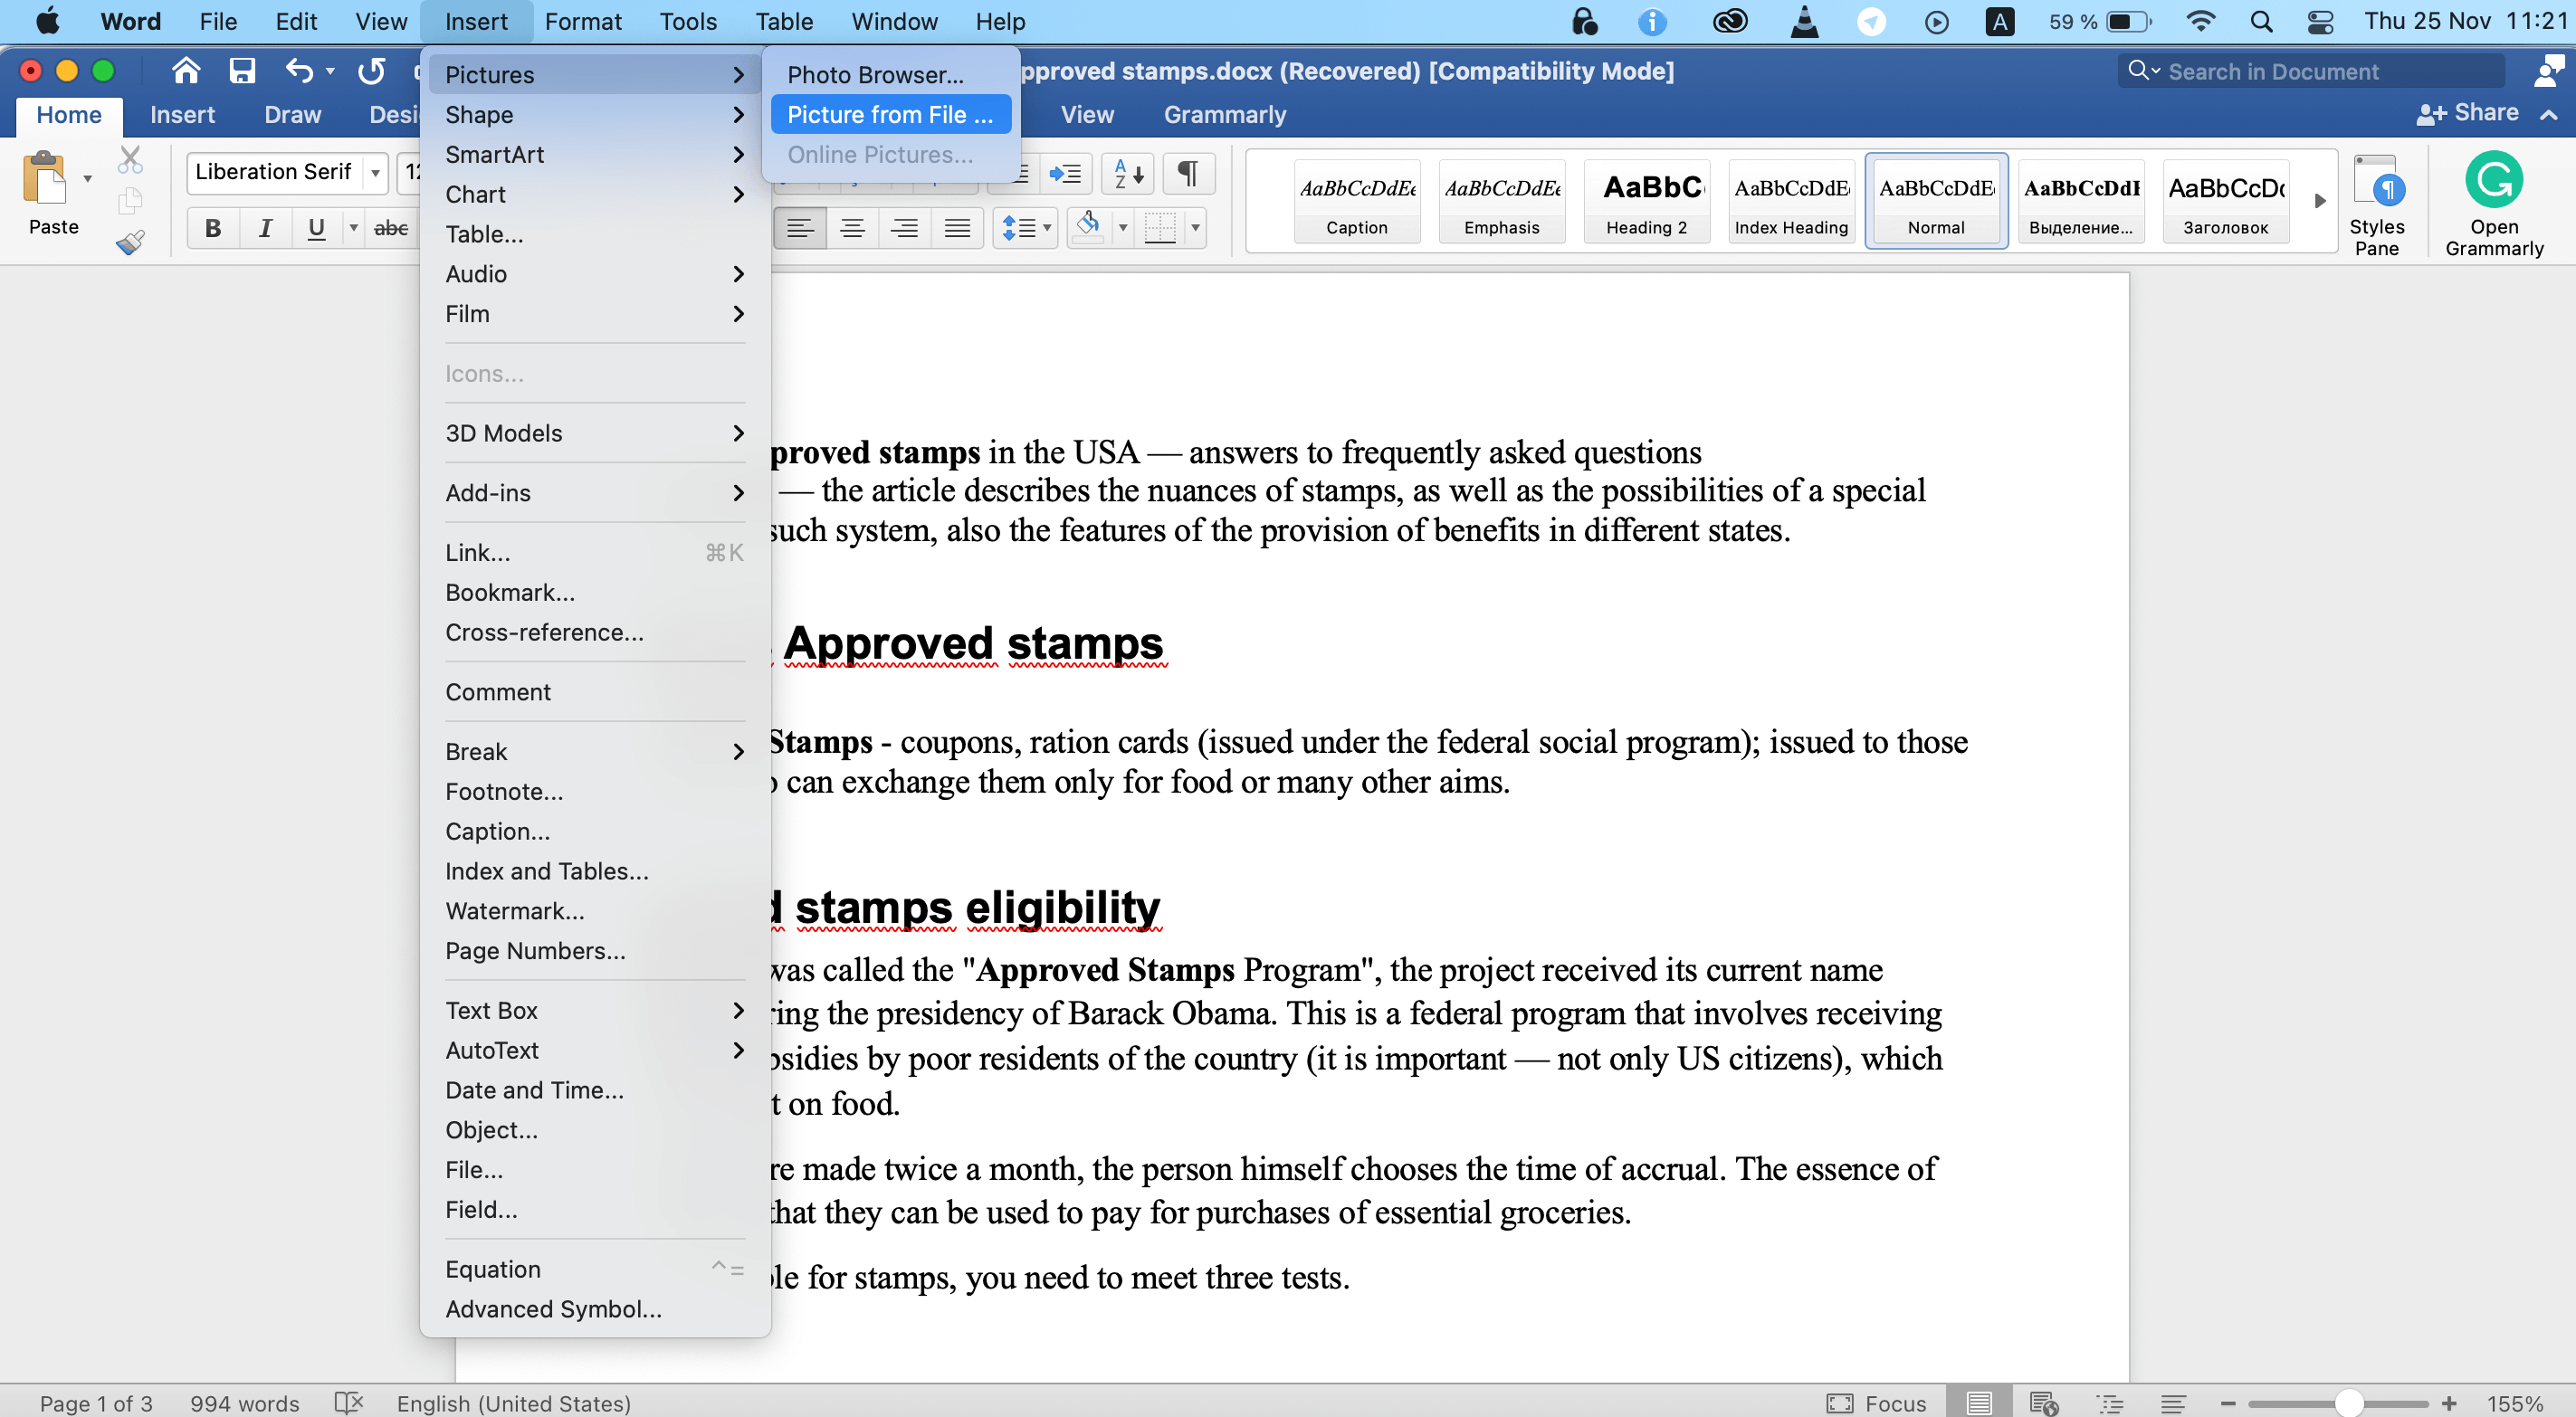
Now, when we print, we go to our document, select the top tab Insert. Click on the picture. In the window that appears, select the print file and click Insert. Then click the right mouse button on our print, select text wrapping, and they push in front of the text. Actually, that's all. I hope you succeeded.

More such stories, you can read in our blog!
Features of the use of a Triangular Stamp
How to create a triangular stamp online wit MyStampReady stamp maker
How to Create a Custom Circular Stamp Logo Layout Step by Step
How to create a rectangular stamp layout.
Develop, read, learn together with mystampready.com!
Date of publication 2019-08-12 04:50:33